


RDS on AWS - Creating RDS
We discussed about pros and cons of RDS and whether to use it or not here
If you made up your mind to use it then this blog covers step by step guide to create and use RDS.
First, you'll need to choose from various database engines like MySQL, PostgreSQL, SQL Server, Oracle, and MariaDB for your RDS instance. Then, select predefined templates suitable for production, development/testing, or utilize the Free Tier RDS setup.
- Ensure availability and durability by configuring settings for high availability and data redundancy to guarantee reliable database operation.
- Next, adjust configurations related to instance type, storage, networking, and security to meet your application's requirements. You can choose instance types based on workload characteristics, define storage options such as volume type, size, and auto-scaling settings to accommodate data requirements.
- Configure network access settings like internal access within AWS services, public access, VPC connectivity, and RDS Proxy setup. Determine connectivity options for EC2 compute resources to interact with the RDS instance, and choose whether to assign a public IP address for external access.
- Specify the Virtual Private Cloud (VPC) and associated subnet groups for deploying the RDS instance within a secure network environment. Additionally, create an RDS Proxy for enhanced database scalability, resilience, and security.
- Set up authentication methods and define user access permissions using password authentication, IAM roles, or Kerberos authentication. Enable monitoring features like Performance Insights and Enhanced Monitoring to track database performance metrics and diagnose issues.
- Configure automated backup settings such as retention periods, backup windows, and replication options for data protection, and enable encryption at rest and in transit to enhance data security and compliance with industry standards.
- Schedule automated maintenance tasks such as minor version upgrades and patching to ensure database health and security. Finally, understand the pricing model, estimate costs, and manage billing preferences to optimize spending and budget allocation for RDS usage.
By following these steps, you'll effectively manage your RDS instance on AWS.
Hands-On -Creating RDS
This blog lets us learn how to create an RDS database in the AWS console by following simple steps.
Prerequisites:
These are the prerequisites for creating RDS in the AWS management console
- Sign in to the AWS Management Console to access RDS.
- Choose a region for deploying your RDS. For this tutorial, we are choosing the Mumbai region.
.png?raw=true)
Step 1: Sign in to the AWS management console, navigate to the RDS dashboard, and click on Create Database.
.png?raw=true)
Step 2: Choose a database creation method.
There are two options available, such as
- Standard Create: This method provides full control over all configuration options, allowing customization of availability, security, backups, and maintenance settings according to specific requirements and preferences.
- Easy Create: This method offers recommended best-practice configurations for quick deployment, with pre-set settings optimized for common use cases, while still allowing flexibility to change certain options post-creation if needed.
.png?raw=true)
Select a method that is most suitable for your use case. In this guide, Let us choose the default Standard Create method.
Step 3: Select an Engine option
AWS console offers six types of database engines such as
- Aurora (MySQL): a High-performance MySQL-compatible database engine.
- MySQL: Open-source RDBMS is known for speed and reliability.
- MariaDB: MySQL-compatible fork with additional features.
- PostgreSQL: Powerful open-source object-relational database system.
- Oracle: Commercial RDBMS is known for scalability and security.
- Microsoft SQL Server: Commercial RDBMS by Microsoft for data warehousing and BI.
- IBM Db2: IBM's RDBMS with advanced analytics and integration capabilities.
.png?raw=true)
Choose an engine that is adaptable for your application. In this guide, Let us select the default PostgreSQL database and its default engine version.
Step 4: Choose a template
AWS offers 3 templates for creating RDS. They are
Production
It is a default setting that prioritizes high availability and consistent performance. Production is ideal for deploying databases in a production environment with minimal configuration required.
Dev/Test
It is configured for development purposes outside of production, allowing for experimentation and testing without impacting live systems. This template offers flexibility for developers to customize settings as needed.
Free Tier
Utilizes RDS Free Tier to develop new applications, test existing ones, or gain hands-on experience with Amazon RDS at no cost. This template is suitable for small-scale projects and learning purposes.
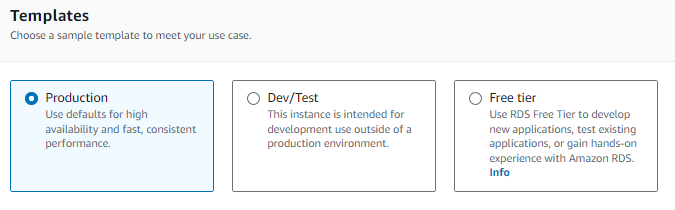
For this guide, we will be choosing a Free tier template. In this template, most of the AWS services for optimizing the RDS are restricted.
Step 5: Creating DB instance identifier
- DB instance identifier: This is a unique name for your DB instance within your AWS account and region. It must be 1 to 60 alphanumeric characters or hyphens.

- Master username: This is the login ID for the master user of your DB instance.
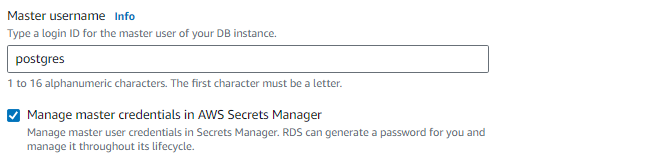
- Manage master credentials in AWS Secrets Manager: This option allows you to manage the master user credentials in AWS Secrets Manager. RDS can generate a password for you and manage it throughout its lifecycle.
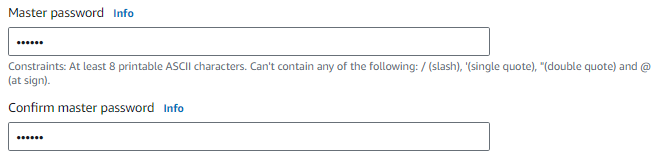
- Create a master password for the master user of your DB instance and confirm it.
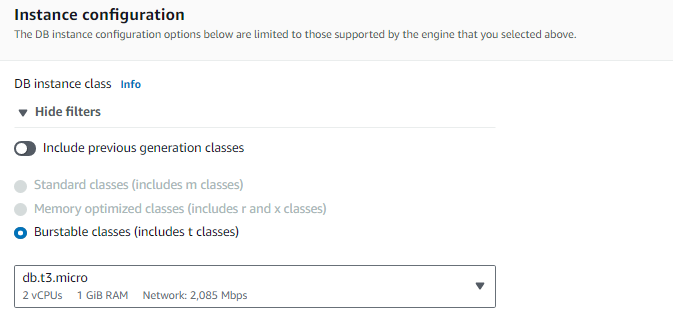
Step 6: DB instance configuration.
AWS RDS allows you to select the type of virtual machine (instance) for your database. The available classes depend on the engine you selected. Common options include
- Standard classes (includes m classes): Balanced compute and memory resources.
- Memory-optimized classes (includes r and x classes): Optimized for memory-intensive workloads.
- Burstable classes (includes t classes): Suitable for workloads with occasional bursts of CPU activity, with a baseline performance level and the ability to burst above that baseline.
In the Free tier template, only the Burstable classes are available.
Step 7: Select the storage type
Storage Types
There are 4 types of storage types available in the RDS storage configuration.
General Purpose SSD (gp2)
This storage type offers a baseline performance determined by the volume size. It's suitable for a wide range of workloads where the performance requirements are not consistently high.
General Purpose SSD (gp3)
With this storage type, performance scales independently from storage. It allows you to adjust performance and size separately, offering flexibility and cost-effectiveness for varying workloads.
Provisioned IOPS SSD (io1)
This storage type provides flexibility in provisioning I/O (input/output) operations per second (IOPS) to meet specific performance requirements. It's suitable for applications with demanding performance needs.
Magnetic
This storage type uses traditional magnetic hard drives and is limited to a maximum of 1,000 IOPS. It's generally not recommended for most modern workloads due to its relatively slower performance compared to SSD storage.
For this guide let us choose General Purpose SSD (gp2).

Storage Configuration
- Allocated storage: This specifies the initial amount of storage allocated for your database instance, measured in gigabytes (GiB). The minimum value is 20 GiB, and the maximum value is 6,144 GiB.

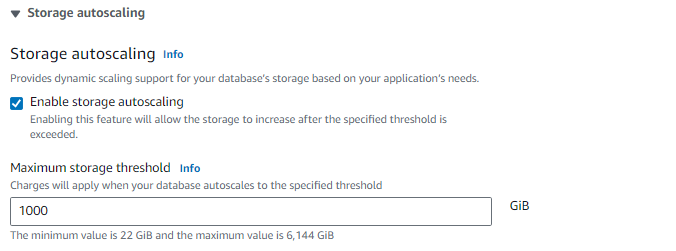
Storage Autoscaling
- Storage autoscaling: When enabled, this feature provides dynamic scaling support for your database's storage based on your application's needs. It allows the storage to increase automatically after the specified threshold is exceeded.
- Maximum storage threshold: This specifies the maximum threshold for storage autoscaling.
Step 8: Setting up the connectivity
In connectivity of the RDS, there are two types of computer resources
Internal Access
Don’t connect to an EC2 compute resource
- Select this option if you don't want to set up a connection to an EC2 compute resource for this database. You can manually configure the connection later if needed.
Connect to an EC2 compute resource
- Choose this option to establish a connection to an EC2 compute resource for this database. This setting automatically adjusts connectivity settings to allow the compute resource to connect to the database.
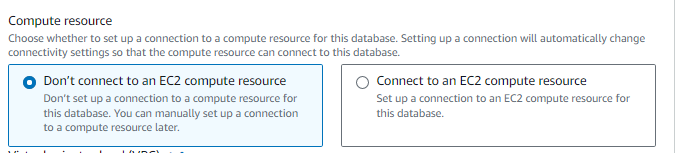
Choose the appropriate option for your application.
Virtual Private Cloud
Select the Virtual private cloud (VPC)
- Select the VPC where you want to deploy your database instance. The VPC defines the virtual networking environment for the DB instance. The default VPC typically includes subnets across multiple availability zones for high availability.

DB subnet group
- Default: Choose the DB subnet group that defines the subnets and IP ranges the DB instance can use within the selected VPC. This ensures proper network isolation and security for the database instance.

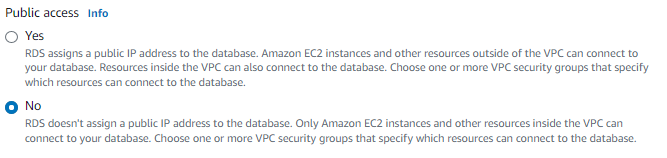
Public access
Yes
If selected, RDS assigns a public IP address to the database, allowing Amazon EC2 instances and resources outside of the VPC to connect. Resources inside the VPC can also connect. You must choose one or more VPC security groups to specify which resources can access the database.
No
If selected, RDS doesn't assign a public IP address to the database. Only resources inside the VPC can't connect. You must still specify one or more VPC security groups to control access.
Since we are creating this RDS learning purpose choose option NO.
VPC security group (firewall)
Choose existing
Select existing VPC security groups that define rules for allowing access to your database. Ensure that the security group rules allow the appropriate incoming traffic.
Create new
If needed, create a new VPC security group to control access to your database.

Availability Zone
Choose an availability zone where the database will be deployed.
RDS Proxy
Create an RDS Proxy
This option allows you to create an RDS Proxy, which is a fully managed, highly available database proxy provided by RDS. RDS Proxy improves application scalability, resiliency, and security by efficiently managing database connections and pooling.

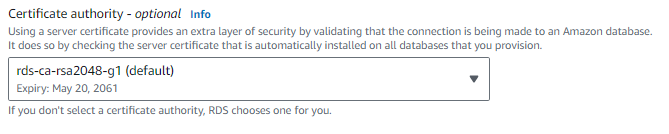
Certificate authority
Using a server certificate (optional): You have the option to use a server certificate for added security. This certificate validates that the connection is made to an Amazon database, providing an extra layer of security. The default certificate authority is "rds-ca-rsa2048-g1".
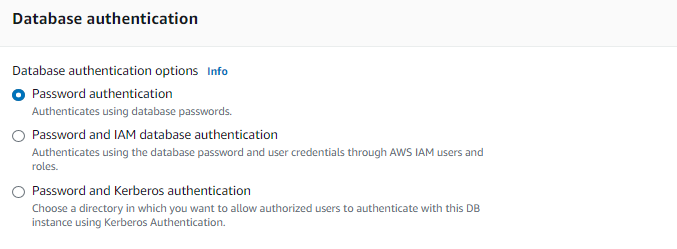
Step 9: Database Authentication
There are 3 types of authentication options available for AWS RDS
Password authentication
This option authenticates users using database passwords. Users provide their database username and password to access the database.
Password and IAM database authentication
In this option, authentication occurs using the database password and user credentials through AWS IAM (Identity and Access Management) users and roles.
Password and Kerberos authentication
This option allows users to authenticate with the DB instance using Kerberos Authentication, in addition to the database password. You can choose a directory in which authorized users can authenticate using Kerberos Authentication.
Password authentication will be selected as default.
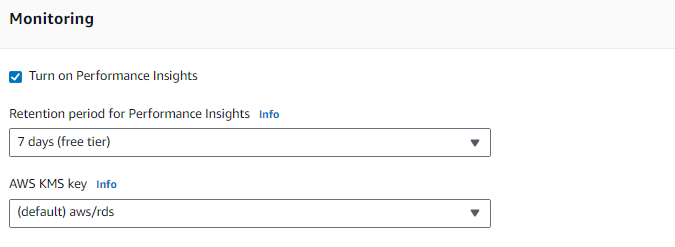
Step 10: RDS Monitoring Setup
Turn on Performance Insights
Performance Insights provides a comprehensive view of your database's performance. Enabling it allows you to monitor performance metrics, query executions, and SQL statements in real-time.
The retention period for Performance Insights
- This setting determines how long Performance Insights data is retained. In the free tier, Performance Insights data is retained for 7 days. After this period, the data is automatically purged. You can adjust this period based on your retention requirement.
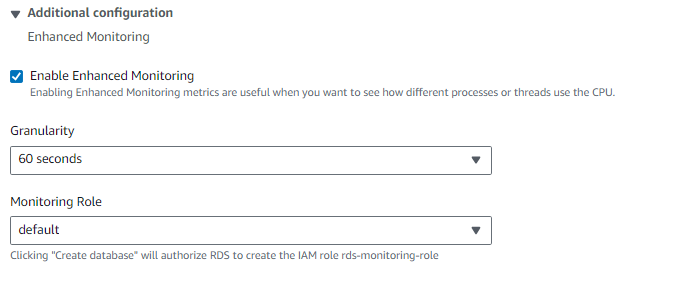
Enhanced Monitoring
- Enabling Enhanced Monitoring is useful for monitoring how different processes or threads utilize the CPU and identifying insights about RDS performance.
Step 11: Additional Configurations
Database Options
- Initial database name: Specify the initial name for your database. If not specified, Amazon RDS will not create a database upon instance creation.
- DB parameter group: Assigns a set of parameters to the database instance. The default parameter group for PostgreSQL version 16 is used.
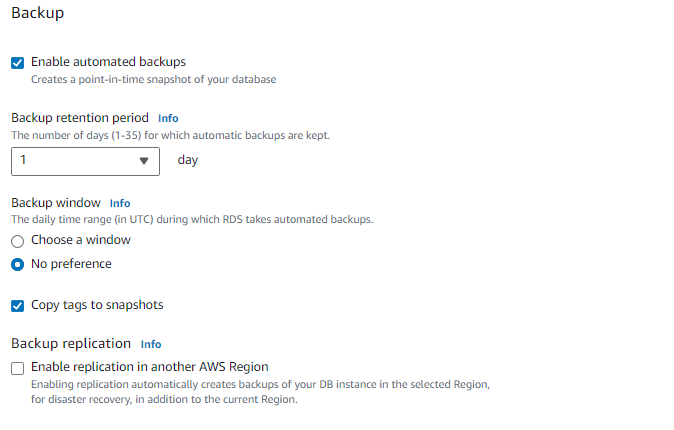
Backup
- Enable automated backups: Creates point-in-time snapshots of your database for data protection and recovery purposes.
- Backup retention period: Specifies the number of days (1-35) for which automatic backups are kept. In this case, backups are retained for 1 day.
- Backup window: Specifies the daily time range (in UTC) during which RDS takes automated backups. No specific window preference is set.
- Copy tags to snapshots: Copies tags from the database instance to its snapshots for better organization and management.
- Backup replication: Enables replication of backups in another AWS Region for disaster recovery purposes.
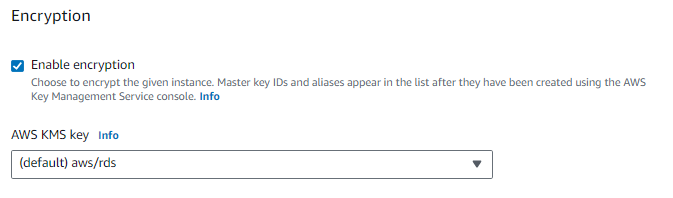
Encryption
- Enable encryption: Activates encryption for the database instance. The default AWS Key Management Service (KMS) key "aws/rds" is used for encryption.
Log exports
- Select the log types to publish to Amazon CloudWatch Logs: Specifies which types of logs (e.g., PostgreSQL log, upgrade log) should be published to CloudWatch Logs for monitoring and analysis.

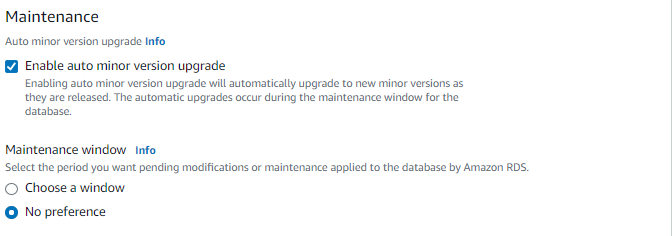
Maintenance
- Auto minor version upgrade: Enables automatic upgrades to new minor versions of the database engine as they are released.
- Maintenance window: Specifies the period during which pending modifications or maintenance tasks are applied to the database instance. No specific window preference is set.
Deletion protection
- Enable deletion protection: Prevents accidental deletion of the database instance by enabling deletion protection. While enabled, you cannot delete the database instance.

Step 12: Billing estimates
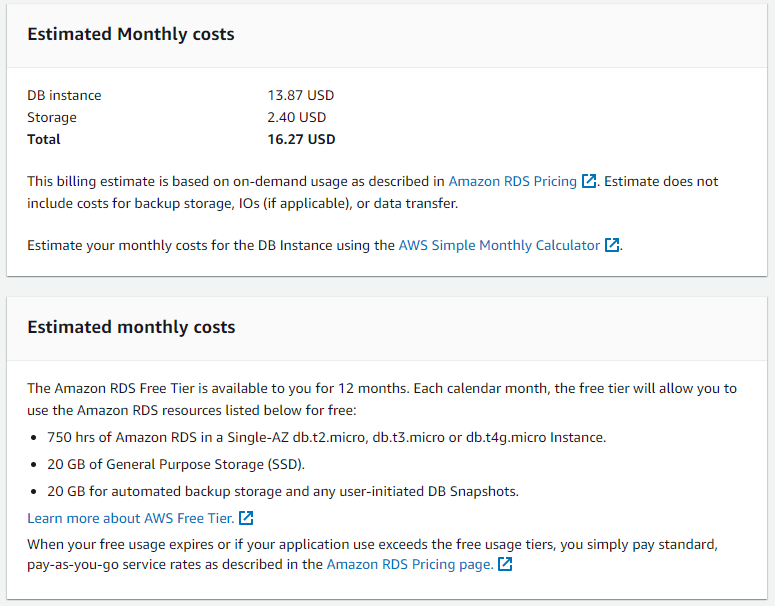
- After configuring your RDS instance, review the billing estimates to understand the expected costs associated with your database deployment.
- Take into account factors such as instance uptime, storage usage, data transfer, and any additional services enabled for monitoring or backup purposes.
- Adjust configurations as needed to optimize costs and align with budgetary requirements.
- Monitor your actual usage and costs regularly through the AWS Billing and Cost Management Console to track expenses and make informed decisions about resource management.
Step 13: After selecting all the options that satisfy the requirements of your application click on Create Database.

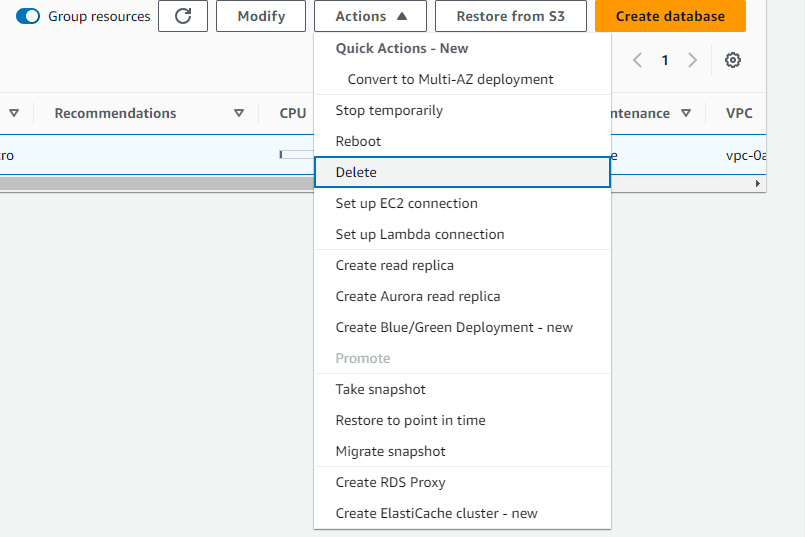
Step 14: Deleting your resources
- When you no longer require your RDS instance or want to stop incurring charges delete the resources associated with the database.
- Navigate to the RDS dashboard.
- Locate the RDS instance you wish to delete and select it.
- Click on the Actions and choose Delete to initiate the deletion proess.
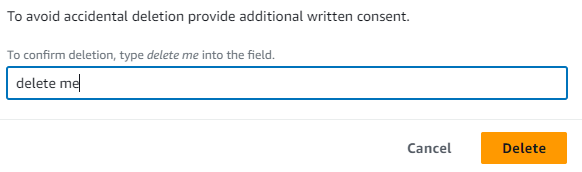
- Confirm the deletion by following the on-screen prompts and acknowledging any potential data loss.
- If you enabled deletion protection, make sure to modify your database configuration before deleting the database. You can modify it by navigating to Modify and disable the protection.
- Review your billing statements to ensure that the resources have been successfully deleted and are no longer accruing charges.
